Sunday 14 September 2014

Birchbox Review: Laqa & Co Lip Lube Pencils


As a new Birchbox blogger when I found out that I had been chosen to review Laqa & Co.'s Lip Lube Pencils, it's safe to say I was absolutely over the moon! I presumed I would be reviewing just one of the two Lip Lube Pencils, but when one of each colour arrived in the post I couldn't have been happier!


As my regular readers will be aware, lipstick and lip gloss are two products that I have never been able to get my head around - whilst I love the look on other people, bright, bold, glossy lips have never looked quite right on me. Perhaps it is my pale skin tone or strangely narrow lips, but for some reason lipstick never ends up applying quite right, whilst lip gloss leaves me in a sticky mess, and so I have always been a lip balm girl. However, the problem with lip balms tends to be the lack of colour, yes they are easy to apply, and yes they are amazing moisturisers, but where's the fun in a lip balm? After all, a little bit of colour never goes amiss - and that is where these *amazing* pencils come in!


When initially applying the lip pencils, the very first thing I noticed about them was how light and moisturising they felt on my lips, leaving me incredibly surprised at how glossy and lipstick-like the peppermint and shea butter formula actually looked. After trying out both colours I found that they both stayed on my lips for two to three hours before a quick top-up was needed, however with the easy twist up pencil, applying a new coat whilst out and about couldn't have been simpler, making the pencils just perfect for everyday wear.
 
 Of the two colours, I initially thought that the purple tone of Menatour would look far too bright with my pale skin tone, however by just applying a light coating the pencil gave my lips a gorgeous pinky hue that would work perfectly for a special occasion or a night out. The subtle colour of the Bees Knees makes it perfect for day to day use, it's coral hue making it work well with any skin tone.  


Overall, I absolutely love these two lips pencils, they're beautifully coloured, easy to apply and best of all, stay on for long periods of time, making them a must-have for any beauty blogger!

Sunday 17 August 2014

The Recipe Read - Avocado for Breakfast

Although I normally tend to stick to sweet recipes for my baking series, The Recipe Read, I just couldn't resist sharing this super healthy and incredibly simple breakfast recipe...


After realizing that I had completely run out of eggs - my preferred Sunday breakfast choice, I came across a pack of avocados I had completely forgotten about and got to thinking how I could use them for my breakfast. However, with the obvious choice of in a smoothie out the window due to the fact I recently broke my blender and have not yet replaced it, I realised I would need to be a little more creative... After some quick recipe hunting I came across this perfect recipe and couldn't wait to try it out!

For this yummy breakfast you will need:

1 medium avocado
A handful of plum or cherry tomatoes
2 slices of multi-grain bread (I chose to use multi-grain sour dough)
1 lime
Salt & Pepper

You will also need:

A chopping board
A fork
A sharp knife

Method:

Begin by slicing the avocado in half, peeling it and then thinly slicing it.


Place the bread in the toaster.

Slice the tomatoes in half and mash up the avocado slices ready to spread onto the toast.


Once the toast has popped up, top with the mashed avocado, add a squeeze of lime juice and salt and pepper to taste, then top with the sliced tomatoes.

Plate up and enjoy!


*disclaimer: this recipe originally came from thekitchn.com


Wednesday 30 July 2014

Review: Forever Aloe Scrub


I was recently approached about becoming a distributor for health and beauty brand Forever Living, a company that until a couple of months ago, I had never heard of. Before making any decisions I decided to try out a few of the products and do a little bit of background research, especially as I knew I wouldn't feel comfortable talking/blogging about products that I don't believe in.

However, after borrowing and trying out a few of a friends products, I was totally in-love and completely hooked! I found out that all the products contain Aloe Vera, and that unlike other Aloe Vera brands, Forever is the only company in the world to use pure Aloe Vera in its products, with many other brands using the leaf and other parts of the plant as well as the pure juice. By using only pure Aloe Vera, each of the Forever products are packed full of nutrients, vitamins and all natural goodness and are perfect for use on all skin types.

Forever's Aloe Scrub has to be one of my favourite Aloe products, the clever formula contains a mixture of Aloe Vera gel and all-natural microspheres of jojoba, making it perfect for gentle cleansing. Plus, with all-natural microspheres instead of the plastic-based ones found in many exfoliating products, this product is sea-life friendly and will dissolve before making its way into the sea.

Unlike facial scrubs that contain chemicals and synthetic cleansers, the all-natural Aloe Scrub protects the skin from any drying or damaging effects whilst gently lubricating and conditioning the skin, making it perfect for anyone who suffers from dry skin. Aloe Vera also has natural antibacterial qualities so if you suffer from spots or acne this face scrub is also ideal for helping to prevents breakouts!

As someone who suffers from eczema I am always wary about what I will try on my skin as there really is nothing worse than a facial eczema flare-up! As the Aloe Scrub is all natural and free of chemicals I was more than happy to try it, especially as friends of mine had mentioned just how good it is for helping to prevent facial eczema, and boy am I glad I did - since trying out the Aloe Scrub my facial eczema rarely makes an appearance, gone are the days of sore, dry and itchy skin.

Now, you may not know this but Aloe Vera has natural antibacterial qualities, making it perfect for using to help prevent spots and more serious break-outs.

My first experience trying out the Aloe Scrub was an interesting one; when I first felt the scrub its texture seemed almost drying and gritty compared to other face scrubs, however once I had applied the scrub to my face I was astounded by just how moisturising it really was, my skin felt seriously smooth and silky - this is when I fell in love!

If you would like to give Aloe Face Scrub a try you can buy it online here, or alternatively tweet, Facebook or email me for some more information.

Tuesday 1 July 2014

The Recipe Read - Homemade Fro Yo

As I am still in training for my 10K Race for Life event next month, I thought I would make this week's recipe read a nice and healthy(ish) one. After some thought and consideration about the perfect recipe, I decided on homemade Frozen Yogurt as not only is it healthy and packed full of fruit, it is also a perfect treat for the gorgeous Summer weather we have recently been having!


With so many recipes for Frozen Yogurt, I honestly couldn't decide which fabulous concoction to try first, however I eventually settled on a yummy sounding Strawberry recipe* that was not only simple and easy to do, but also did not require an ice cream maker, which considering the fact I don't have one, was rather fortunate.

To create this delicious treat you will need:

455 grams of fresh Strawberries
85 grams of Caster Sugar
160 grams of Greek Yogurt
1 tsp of fresh Lemon juice
Sprinkle of Xanthan Gum (optional)

You will also need:

A set of measuring scales
1 large mixing bowl
A blender
Wooden spoon
Clingfilm
Freezable container

Method:

Begin by slicing the strawberries into thin pieces.

Then place the strawberries in the mixing bowl with the sugar, stirring until the sugar begins to dissolve. Cover with Clingfilm and leave to stand at room temperature for an hour.

Place the strawberry and sugar mixture into the blender, add the yogurt, fresh lemon juice and Xanthan Gum if using. Blend until the mixture is smooth.

Place the mixture in the fridge to chill for one hour.

After an hour place the mixture into the freezable contain and place in the freezer. Be sure to check mixture regularly, stirring every 40 minutes to help stop ice crystals forming and ruining the texture.

Once fully frozen, remove from freezer, serve and enjoy.


Helpful hint: although the Xanthan Gum is optional, it thickens the mixture and gives it a better texture, preventing ice crystals from forming. For anyone without an ice cream maker, Xanthan Gum is an excellent buy, available from Whole Foods and Sainsbury's.


*Disclaimer: this recipe originally came from twopeasandtheirpod.com but has been modified for use without an ice cream maker.

Sunday 29 June 2014

Review: L'oreal Paris Skin Perfection Day Moisturiser


After receiving a free sample pack of L'Oreal's new Skin Perfection Day Moisturiser from the good people at Cosmopolitan, I decided to write up a little review.

Aimed at women in their 20s and 30s, the new L'Oreal Skin Perfection Range aims to perfect skin quality by transforming its appearance; blurring pores, evening out skin tone and leaving skin texture smooth and hydrated.

When applying the moisturiser I found that it was easy to apply, soaking in quite quickly without leaving any sticky or oily residue, giving a matte look finish once dried - perfect for wearing alone, or ideal as a base for applying foundation.

As someone who suffers from Eczema and sensitive skin, I sometimes find that moisturisers can leave my skin looking red and feeling sore; however with L'Oreal's Skin Perfection Moisturiser this wasn't the case, instead it left my skin feeling smooth and fresh.

If you would like to try this product, it is available to buy here!

Health and Nutrition: 9 Day Detox Program

For my first Health and Nutrition post I thought I would start with the 9 Day Detox Program from Forever Living.


The Clean 9 Detox program which has been developed by an expert nutritionist, is the weight loss brain child of Aloe Vera company Forever Living. The 9-day cleanse and weight loss program encourages the body to rid itself of harmful toxins, allowing a safe and healthy weight loss of between 7 and 14IBS

As I said previously, I do not in any way support fad-diets or dangerous weight loss plans, however as the Clean 9 Detox is formulated by a top nutritionist and is also endorsed by doctors, it is clear that it is a safe and healthy body detox and weight loss program that is suitable for anyone over 18.

Having recently been featured in lifestyle magazines OK and Cosmopolitan, the Clean 9 Detox is currently an incredibly popular program that is guaranteed to improve your general health, hair and skin complexion, whilst aiding weight loss.

Incase you are wondering how it all works, let me just explain...

The program is split into two parts; for the first three days of the cleanse you drink only the specially formulated shakes, whilst taking Aloe Vera Gelly, then for the final six days of the program you have shakes, Aloe Vera Gelly and a 600 calorie meal of your choice each evening, which can be anything from a side salad, to a small bowl of spaghetti bolognaise.

Although going three days without eating a solid meal sounds extremely difficult, the shakes themselves are actually incredibly filling, so if you are doing the detox you shouldn't feel too hungry!

The Clean 9 Detox has been proven to have fantastic results again and again, and has become something of a beacon of hope for anyone struggling to kick start weight loss. So if you are over 18 and struggling with your weight, why not give Clean 9 a chance to give you a helping hand - after all, what have you got to loose, except those extra pounds of course!

If you are interested in taking part in the Clean 9 Detox please feel free to get in contact with me, as I am a Forever Living Distributor and so can provide advice and help you place an order. Please contact me via twitter @bethmahoney92, or comment on here and I will get back to you - promise!


Friday 27 June 2014

thumbs for fashion: Health and Nutrition

Partly due to my Race for Life 10K training program, diet plan and health kick, I decided to start a new weekly series on the blog, based purely on health and nutrition.


As someone who has always been exercise phobic, picture the girl from school who would hide in the loos or forge an injury note just to miss double P.E and that's me, so all this training is basically brand new for me.

However, I have always been a diet and nutrition geek, trying out every diet under the sun, from the Cabbage Soup Diet to the Celebrity Slim Milkshake Diet, and so have always had an interest in this side of things. Plus, with my fiancé an aspiring Personal Trainer, I am pretty well informed on health, fitness and nutrition these days.

[Please note, I am not in any way endorsing dangerous fad-diets, in fact today I am very anti them and prefer to eat healthily and stay active, or as active as any exercise hater can be!]

For my first health and nutrition post just watch this space.

Review: L'occitane Ultra Rich Body Cream, Orange Honey


Anyone who reads my blog regularly will know that I am a real L'occitane lover, with what some would call a growing obsession with their products. (Disclaimer: I honestly can't seem to help myself, they're just so luxurious and pretty much, perfect in every way.)

I should probably mention here that (a small) part of the reason I love the L'occitane products so much, is the design and dĂ©cor of the packaging. You see, I am a major design geek with a love of anything pretty, chic, or ever so slightly vintage, and L'occitane's curiously different packaging style totally meets the criteria, making me, ever so slightly, more obsessed!

I must admit that although I am a fan of all of the Ultra Rich Body Creams, the orange honey one is my absolute favourite, purely because of its gorgeous smell and long lasting fragrance.


When you initially open the lid of this cream, the first thing you notice is the gorgeous smell; it's fruity, fresh and downright divine, and absolutely perfect for smothering yourself in before a night out, a date or if you're feeling special, perhaps even for a day at the office.

With 25% Shea Butter, L'occitane's Ultra Rich Body Cream is thick, smooth and incredibly creamy making it just perfect for protecting and nourishing skin. Plus, with its quick soaking in time and lack of sticky residue, as well as its ability to soothe my Eczema despite the fact it's scented, which any Eczema suffer knows is normally a big no no, L'occitane's Ultra Rich Body Cream is most definitely worth the money.

If you would like to try this product, why not visit your local L'occitane or you can buy it here.

Thursday 26 June 2014

Inside my Make-up Bag

I have recently seen quite a few fashion and beauty bloggers doing posts on their favourite make-up bag items, which by the way, is an idea that I absolutely love, especially when they introduce me to new products - eek! So, as I am such a fan I thought that I would give it a go myself and share the contents of my make-up bag with the rest of the blogsphere...


Although it is slightly on the small side, I do just about manage to squeeze all my favourite products into it, on the bright side its smaller size means that it doesn't weigh down my handbag, which is always a bonus.

It's small size aside, the reason I've compromised with this make-up bag is purely because I love its floral print design and its easily wipeable surface - it might sound mad but material make-up bags are just too much effort, especially when you're always spilling foundation like me.


A quick guide to what is in my make-up bag (going from top left to right): Barbara Daly Foundation, Celline Concealer stick, Rimmel Match Perfection Foundation, Rimmel Fix and Perfect Primer, Rimmel Lasting Finish Lipstick (colour: Tantrum), Maybelline Rocket Volume Express Mascara, Rimmel Clear Complexion Powder (clear), eyelash curlers, Rimmel Kohl Eyeliner, Maybeline Blush'em, powder brush, sharpener, tweezers, L'occitane Dry Skin Hand Cream, and L'occitane Cherry Blossom Hand Cream.

In case you are wondering what makes these products make-up bag essential, let me just explain why each and everyone of these products are total lifesavers;

Barbara Daly Foundation: I just love this foundation, it's light and easy to apply, doesn't dry your skin out and best of all, it's oil-free - perfect for any oily skin suffers! Its light coverage smooths and levels out your complexion, giving a natural look that is perfect for summer. Available to buy here. (For a more in-depth review have a read of this).


Celline Concealer Stick: I'll admit that normally I would always buy a Rimmel cover-up stick, however, when I saw this on sale I couldn't resist giving it a go. Providing a smooth, creamy, light coverage this concealer is perfect for me as I rarely suffer from spots and blemishes, however it isn't exactly practical for covering up spots when they do occur - although great for covering dark circles and small marks, this concealer doesn't seem to be made for anything more.


Rimmel Match Perfection Foundation: As this foundation provides quite thick and long-lasting coverage, I tend to use it primarily for non-day-to-day wear, so for nights out and other events. However, its SPF 18 protection would also make it ideal for daytime use - available to buy here.


Rimmel Fix and Perfect Primer: Unlike many Primer's currently on the market, Rimmel Fix and Perfect is not skin coloured, and so, although it has many excellent qualities, I have found that it doesn't look great worn without foundation, despite what the bottles says. However, I do absolutely love the silky smooth feel of this product, as well as its skin smoothing ability, and its brightening and matifying results. Plus, its low price makes it a fabulous bargain - available to buy here!


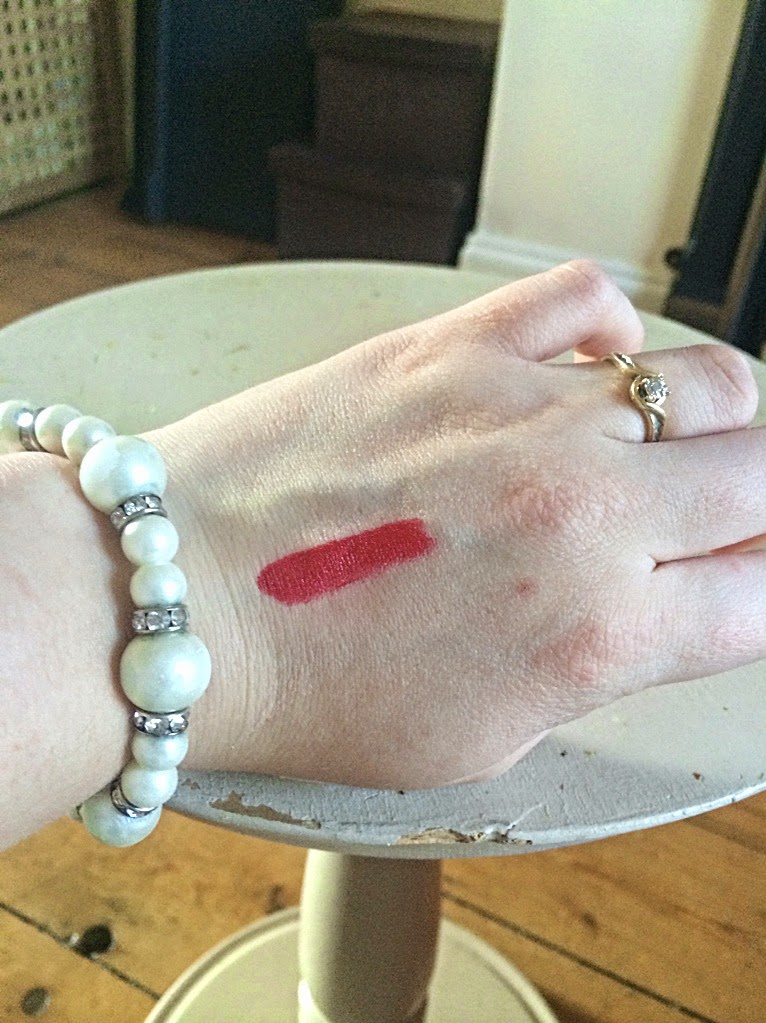
Rimmel Lasting Finish Lipstick (colour: Tantrum): Although I don't tend to wear lipstick on a regular basis, I do love the colour and feel of Rimmel's lip products. I just love the bold eye-catching colour that makes Tantrum the perfect colour for nights out and other dressy events, as well as to simply brighten up any day-to-day outfit. (Buy it here!)


Maybelline Rocket Volume Express Mascara: With its jet glide brush and smooth, clump free formula, the quick and easy application of this is amazing, giving massive volume with just a few strokes. What I love most about this mascara is the ease of application and the excellent results from just one application - perfect for the morning rush! (You can buy it here.)


Rimmel Clear Complexion Powder: For someone like me who suffers from incredibly shiny skin, Rimmel's Clear Complexion Powder is an absolute god-send! It works perfectly with pretty much any foundation to help matify and control shine, and best of all, unlike many other pressed powders, its translucent colour means there is no cakey-looking powder residue - for best results I would suggest applying with a powder brush, instead of a sponge! (You can buy it here!)


I had a little accident and dropped my powder but hey ho, it still works the same!

Rimmel Kohl Eyeliner (brown): As someone with naturally pale skin, I always find that black eyeliners wash me out, so as a rule I always stick to a dark brown. Of all the products in my make-up bag, this is most definitely one of my favorites as  I just love the versatile options the eyeliner pencil offers; unlike gel and liquid liners the pencil allows me to choose just how subtle I would like to make my eyeliner. Of course the downside to pencil eyeliner if the smudge factor, however a little trick I use to set my eyeliner in place, is to sweep a small amount of Rimmel Clear Complexion powder under my eyes, this keeps the area dry and pretty much smudge free! (You can buy it here!)


 Maybelline Blush'em: This mini pallete is perfect for subtly adding a little bit of colour to my often pale cheeks, the two-toned colour of the pallete makes it an excellent product for contouring and highlighting. (You can buy it here!)


 L'occitane Dry Hand Cream and L'occitane Cherry Blossom Hand Cream: These hand creams are both essential make-up bag items; highly moisturizing, quick to soak in, and of course, they smell absolutely amazing. I must admit that although a little on the pricey side, I am a real fan of L'occitane, I just love how moisturizing and high quality all their products seem to be.


 So there you have it, a comprehensive guide to each of my make-up bag essentials - if you have any questions or suggestions please do comment below and I will do my very best to get back to you!

Sunday 22 June 2014

My 10K Challenge: Race for Life


Anyone who knows me will know that I am not sporty at all, in fact the mere thought of exercise turns me into a quivering mess. However, earlier this year I pledged to compete in the 10K Race for Life; you might be thinking that for someone who hates exercise choosing the 10K instead of the 5K was a mistake but you would be wrong - if I was going to use exercise to go head to head with the disease that takes so many, then I wanted a challenge.

So, about four months ago I went out, brought trainers, went for a couple of runs and stopped there - work, uni and general life seemed to always get in the way of my training, but now, with just over a month until the big day, I have a lot of work to do.

I have found a running plan that claims to be able to get anyone up and running 10K in just 4 weeks, so with that, some Mo Farah style healthy eating (here comes the Quorn) and a lot of hard work, I should, fingers crossed be able to cross the finish line.

My aim is to raise 250 GBP, if you would like to help me reach this goal please visit my JustGiving page here. Any donations, big or small will be really appreciated.

Although this challenge is about raising money and awareness of Cancer, it is also a personal goal of mine to be able to run an entire 10K, get in shape and hopefully, get fit for life.

So, the plan is to post on here about my training plan, diet and overall health throughout the 4 weeks to keep me motivated and on-track - all I can say, is wish me luck!

P.S If you have any advice for me please feel free to comment.

Thursday 12 June 2014

Time for a catch up...

For anyone who reads my blog on a regular basis and has felt somewhat neglected over the past few months by my lack of postings, I can only apologise. The truth is that over the past few months I have been super busy and have struggled to find time to do anything other then university work and the odd bit of housework here and there. All I can say is that the last few months of university were a struggle and although all I wanted to do was blog, I had no choice but to dedicate my time to my university work!


Here I am handing in my LAST EVER piece of uni work.....

However, as I have now FINALLY finished for good, I have all the time in world, except of course when I am frantically job hunting, to write and maintain my blog - eek!

All I can say is keep watching this space, as over the next few months there will be a lot of exciting posts to come.


Thursday 24 April 2014

NAILS NAILS NAILS: How to create a two toned manicure

Until a few days ago I had never even considered dipping into the world of nail art, mainly because I have incredibly shaky hands - simply painting my nails can be a struggle! So I knew I had no hope of ever perfecting the art of free-hand nail art.

However, I then read an online Cosmo article based around simple ways to perfect nail designs, such as the two toned manicure - eek!


Please note that these still require a little perfecting!

To produce a two toned manicure you will need:

A light coloured nail polish
A darker coloured polish
A base/top coat polish
A role of selotape - yeah that's right, selotape!

Instructions:

1. Begin by soaking nails in warm water to soften the cuticles.

2. Cleanse nails with nail varnish remover, even if already free of nail varnish.

3. Paint nails with your chosen base coat - I always use Barry M's all-in-one basecoat, topcoat and nail hardener, available to buy here.

4. Once the base coat has dried, fully paint all nails in the lighter coloured polish. For this I chose to use Barry M Gelly in Dragon Fruit, available to buy here. (It is up to you how many coats of nail polish you use, I personally always use two!)

5. Once the first colour polish is dry, wait around two hours just to make sure it is fully set and then you can continue.

6. Choose the design you want, either diagonal as I did, or straight down the middle, or if you are feeling adventurous you could attempt a triangular design in the centre of each nail - it's totally up to you!

7. Cut small pieces of selotape of the role and begin positioning them on your nails, the idea is to cover the area you don't want to paint. For example, for a diagonal design, place the edge of the selotape diagonally down the nail, covering one half and leaving the other half uncovered.

8. Then take the darker coloured polish, (I chose to use Rimmel's Lasting Finish Double Decker Red, available to buy here) and paint over the entire nail, including the selotape.

9. Once you are sure the nails are dry, gently remove the selotape from your nails and you should have a two tone nail design, as shown in the picture above.

10. Top nails with a topcoat and voila, your two toned manicure is complete!


Wednesday 23 April 2014

Review: Barry M Gelly

Anyone who reads my blog regularly will know that back in February I invested in my very first gel-style nail varnishes from Models Own's new Hyper-Gel collection.

Now, I must admit that at the time I loved my new polishes with all my heart, however, over the past few months I began to slightly tire of the long drying times and sensitive smudge factor of these polishes.

Don't get me wrong, I still like the Models Own Hyper-gels but I decided to try a couple of Barry M's Gelly polishes to see if they gave me a better and slightly quicker result.


After some careful consideration and a lot of umming and arring, I finally decided on a pretty pink known as Dragon Fruit - a perfect spring/summer colour.

After carefully applying my base coat, (I use Barry M's all-in-one base coat, top coat and nail hardener, available here) I then applied two layers of Dragon Fruit (available to buy here) and once completely dry, I then topped with Barry M's all-in-one top coat.

Although the drying process did take a little longer than I had hoped, it was significantly quicker than the Model's Own hyper-gel polishes, which was of course a major bonus of this product. The other thing I just love about the overall finish of the gelly, was the super smooth and shiny finish of the polish, giving my nails a professional gel look.


TRIP TO MANCHESTER!

Until earlier this month, I had never been to Manchester, and if I am being honest, I was not entirely sure what to expect; however, I must say that I was pleasantly surprised by my little visit!

Although I had never been to the area before, my fiancé, who is an avid Man City supporter, is somewhat of a regular to the area (for obvious reasons), and so he was able to show me all the best places around.

We began our trip with a compulsory visit to the Etihad Stadium and gift shop, in Sports City.

As you can see, my lovely fiancĂ© was VERY excited! 


After what seemed like hours, Man City's biggest fan, aka the fiancé, finally picked a new Man City shirt to take home, and off we went again. (I must say, I really do approve of the retro-style shirt he picked out!)

Our next stop was in Rusholme, a small suburb outside the city centre, where and I quote, "there is the best sweet shop in the world", otherwise known as, Sanam Indian and Pakistani Restaurant and Sweet House.

I just love the bright colours of the sweets!
We choose a selection of yummy looking sweets, including an Indian version of good old coconut ice - my favourite kind of sweet! Although I was incredibly excited to try our sweets, I was a little apprehensive about how expensive they might be, especially as we had a box full, but luckily for me this whole box cost just £5 - such a bargain!

Once we had enjoyed our little 'snack', shall we call it, we headed off in search of my brother's flat, where we were spending the night. After accidently getting lost in Bolton, we finally made it.

Pretty soon after we arrived, my brother took us to a local eatery that served a delicious selection of cakes - perfect for an evening snack!


There was such a lovely selection of desserts to choose from, including a slightly strange sounding, mint custard dessert and chocolate brownie combination, that I felt spoilt for choice. However, I stuck to what I know, so to speak, and choose a gorgeous chocolate orange dessert (pictured above). For anyone who doesn't know me, I have a real 'thing' for chocolate and orange combinations, making this just perfect for me and my orange-loving, sweet tooth!

The following day I spent the afternoon exploring The Trafford Centre with my brother and his girlfriend, whilst my finace attend a work event in the city.

I must say that The Trafford Centre was so much more than impressive, it was totally gorgeous and best of, was packed full of all my favourite fashion stores. I think it is safe to say that I totally fell in love...


NAILS NAILS NAILS: Rimmel's exclusive Rita Ora collection!

I wasn't planning on blogging today, but when I popped to the shops earlier this morning and caught a glimpse of Rimmel's new nail varnishes, which I must say are absolutely beautiful, I just couldn't resist writing a sneaky little post.

A small selection of the 12 colours available - eekk!


These pretty little beauties are part of Rimmel's new 12 shade collection created in collaboration with Rita Ora.

The best thing about this little collection, apart from the fact that Rita's face is on every bottle of course, is the mix up of hot and cold colours, including strong sexy colours, such as orgasm (nail varnish name) red and slightly softer tones, such as breakfast in bed (name of nail varnish) - not to mention the somewhat quirky names!


Sunday 6 April 2014

The Recipe Read - Banana Loaf

Although I initially aimed to write a 'Recipe Read' post on a weekly basis, with my current university schedule it hasn't so far been possible, but hopefully in the next few weeks I should have a little more free time, so be sure to watch this space!

For this week's very late recipe post, I decided to bake a simple banana loaf as its fruity flavor makes it a perfect treat for the upcoming summer weather - fingers crossed for lots of lovely sun!


Although slightly different to a classic banana bread recipe, this banana loaf is just as tasty and much more simple to make, not to mention slightly cheaper too, so perfect for anyone on a budget. Plus, the best thing about this yummy recipe is that it is a perfect way to use up any slightly worse for wear bananas that are lurking in your fruit bowl - waste not, want not, ay!


To bake this delicious treat you will need:

140g of butter
140g of caster sugar
3 medium free-range eggs
140g of self-raising flower
1 tsp baking powder
2 ripe bananas

You will also need:

A loaf tin
Greaseproof paper
A wooden spoon or an electric mixer
A large mixing bowl
A fork for mashing the bananas
A set of scales

The method:

Start by pre-heating your oven to 180 degrees, then butter and line your loaf tin with greaseproof paper.

Then gently cream the butter and sugar together until it is smooth and fluffy. [Helpful hint: pop the butter in the microwave for 30 seconds to soften it slightly to make mixing easier!]

Then add the eggs and stir into the mixture.


Once the eggs are completely mixed in, begin sieving the flour and baking powder into the mixture, folding in small amounts of flour at a time.

Next mash the bananas in a separate bowl and then add to the mixture, making sure to distribute evenly throughout the mix.

Finally pour the mixture into the loaf tin and pop in the oven for 30 to 40 minutes, checking occasionally until golden brown and completely cooked.


Despite the delicious aromas coming off your freshly baked banana loaf, be sure to leave it to cool for a few minutes before turning it out onto a wire rack, and attempting to devour, as not only will it be very hot it may also collapse. You have been warned!

Happy baking!


Wednesday 12 March 2014

Review: Rimmel Space Dust


As I have said before, I am a Rimmel girl through and through. From foundation to nail varnish, Rimmel has always been one of my favourite, go-to brands, and that is why I was so excited when they bought out Space Dust just before Christmas.

Until Rimmel Space Dust was introduced, I must admit that I wasn't all that sure how I felt about glittery nail polishes.

You see, what I always found, was that I didn't particularly like the look of regular nail polish finished with a glittery top coat, for some reason it never looked quite right, not to mention the fact that the glitter always seemed to refuse to spread evenly out... I also found, that when I applied the glittery varnish to my naked nails, bare of a colourful under coat, my hands felt just that little bit too plain - perhaps I am just a bit too fussy when it comes to my nails!

When I saw Space Dust advertised online last November, I wasn't too sure what to make of it. It looked perfect, thick and full of glitter, exactly what I has been waiting for - a glitter polish that was made to be worn solo!

Luckily for me, 'Santa', aka my lovely fiancé, brought me a pot of this pretty polish for Christmas, and since trying it out, whilst munching a festive breakfast of smoked salmon and poached eggs, I can honestly say I haven't looked back.


For me, the best thing about this polish is the thickness of it, along with the clever textured formula of glitter used as a base, instead of the usual clear affair.  I also, absolutely love the way it is quick and easy to use, how it dries nearly instantly, and amazingly, how without any sort of top coat, it seems to be pretty chip resistant!

Rimmel Space Dust is, most definitely, the answer to my glitter polish prays, as it can be applied straight to naked nails, giving a major, professional looking, wow factor, with just two quick-drying coats!


Monday 10 March 2014

PANCAKE TIME - Yes, I know I am nearly a week late!

I may be a few days late with the Pancake Day post, but that's just because I ended up going out for dinner on the day itself, and by the time I got home I was sadly just too full to even consider a late night snack.

However, this meant that last night I was able to treat myself to a stack of pancakes - a perfect weekend treat!

I must admit that although I can cook, pancakes have always been my weakness; the batter is either to thick or too thin, and regardless of the amount of oil I use, they just always seem to stick.

But, this year there was one mighty difference, my new non-stick, Tefal frying pan - all I can say is...total lifesaver!

For once, almost perfect pancakes!

Pancake cooking aside, for me one of the best parts of pancake day is the toppings. The problem is, I literally love everything, from sweet to savoury, from simple lemon and sugar, to dill, smoked salmon and cream cheese. I am a total foodaholic.

This year however, due to a combination of a lack of funds, and me being in a totally sugar craving mood, I stuck to topping my pancakes with sweet treats.

If I am making pancakes myself, as a pose to popping to a pancake house, I tend to stick to the old classic of lemon and sugar, as I love the balance of the sour, fruity lemon juice and sweet sugar. However, this year after watching my partner make a delicious looking nutella and banana pancake, I just could not resist a taste.

Yummy nutella and banana pancakes!

Although a lot sweeter than my all time favourite, lemon and sugar, this yummy topping of nutella and banana makes for a great treat for anyone, who like me, has an incredibly sweet tooth.


Friday 7 March 2014

The Recipe Read - Gluten Free Chocolate Mousse Cake

Welcome to the first ever post from my new series, The Recipe Read.

After noticing that a few other fashion and beauty bloggers have recently embraced their inner foodie, I decided that I too, would start my own mini cooking series.

I decided to start with this yummy mousse cake recipe, one, because it's full of chocolate and I am a self confessed chocoholic, and two, because it's gluten free!

This cake is just so good!

I must admit that when my fiance first made me this delicious chocolate mousse cake as a Saturday night treat, it didn't even cross my mind that it was gluten free, and so people like my mum who suffers from gluten intolerance and often struggles to find new gluten free foods to try, could also enjoy it.

To make this tasty treat you will need:

300g of dark chocolate
150g unsalted butter
55g caster sugar
6 eggs
extra butter to grease the tin

You will also need:

A cake tin with a removable bottom
Greaseproof paper
A hand held or preferably, an electric whisk
A mixing bowl
Heat proof bowl
A set of scales

The method:

First, pre-heat over to 150 degrees, and grease and line cake tin with grease proof paper.

Then, bring a pan of water to the boil, place heat proof bowl on top of saucepan and add butter and chocolate, stir continuously until completely melted. Remove from heat and leave to cool slightly.

Then crack eggs into a separate mixing bowl, add sugar and whisk until the mixture becomes thick and mousse like. (If done by hand, this takes about half and hour and a lot of elbow grease!)

Once a thick mousse mixture is formed, slowly fold the melted butter and chocolate into the mixing bowl and stir gently until the chocolate is completely mixed in.

Slowly pour the mixture into the greased cake tin and place in the middle of the over for about 20 minutes, or until it appears part-cooked.

Once cooked, remove from the oven and let it cool for around 40 minutes before serving.

Happy Baking!


Thursday 6 March 2014

Apologies!

For anyone who regularly reads my blog, I do apologise for my recent absence from the blogsphere! I've been struggling to balance my life - it turns out that writing a dissertation is much more time consuming than I first thought!

However, I promise to manage my time more efficiently from now with more regular posts coming up in the next few weeks!

So, remember to pop back and have a read!

Sunday 16 February 2014

REVIEW: Barbara Daly foundation


Finding the right foundation is, for many of like attempting to climb Mount Kilimanjaro - a lifelong ambition. (But not quite as extreme, obviously.) 

I myself have always struggled with foundations as I have somewhat oily, shiny skin that tends to dry out incredibly quickly, meaning that for my skin to look its best I need a foundation that is moisturizing, not too oily and that gives a matte look finish - fussy, I know. 

As I have said before Rimmel is my go to brand, from eyeliner to powder, it is most definitely a brand I trust and so it makes sense that for the past few years Rimmel is the only foundation I have really used, that is until a couple of days ago when I invested in a little bottle of Barbara Daly make-up. 

To be totally honest, when I walked into the beauty section I was always going to buy yet another tube of Rimmel's Matte Look foundation, however,the slightly lower price of the on sale Barbara Daly collection caught my eye. 

Priced at just *£4 this oil-free foundation seemed like a real bargain, and so with my bank account in mind, I decided to throw caution to the wind, scrap the Rimmel foundation and invest in something new, and dare I say it, something a little cheaper. 

I must admit that I love the frosted look of the little glass bottle that the foundation comes in, it really adds a touch of class to the product.


The first thing I noticed about the foundation itself was the gentle floral scent it seemed to be infused with, not overly strong or heavy but perfect for taking away that 'foundation-smell' that you get with many high-street branded products. 

The texture of the foundation feels light and silky and can easily by applied using just your finger tips with a little help from the built in bottle lid spatula, as I call it. 

The thinner consistency of the foundation allows it to give only a light covering, perfect for creating a natural look, however this thinner consistency makes it almost impossible to cover blemishes without the use of concealer or powder.

In my new BD foundation, perhaps in need of a little blush?


Despite the lack of spot and blemish cover this foundation provides, it's light texture, matte look finish and of course low price makes it a great buy and one which I would most definitely recommend.


*disclaimer: £4 sale price, usually priced at £8, available to buy here